
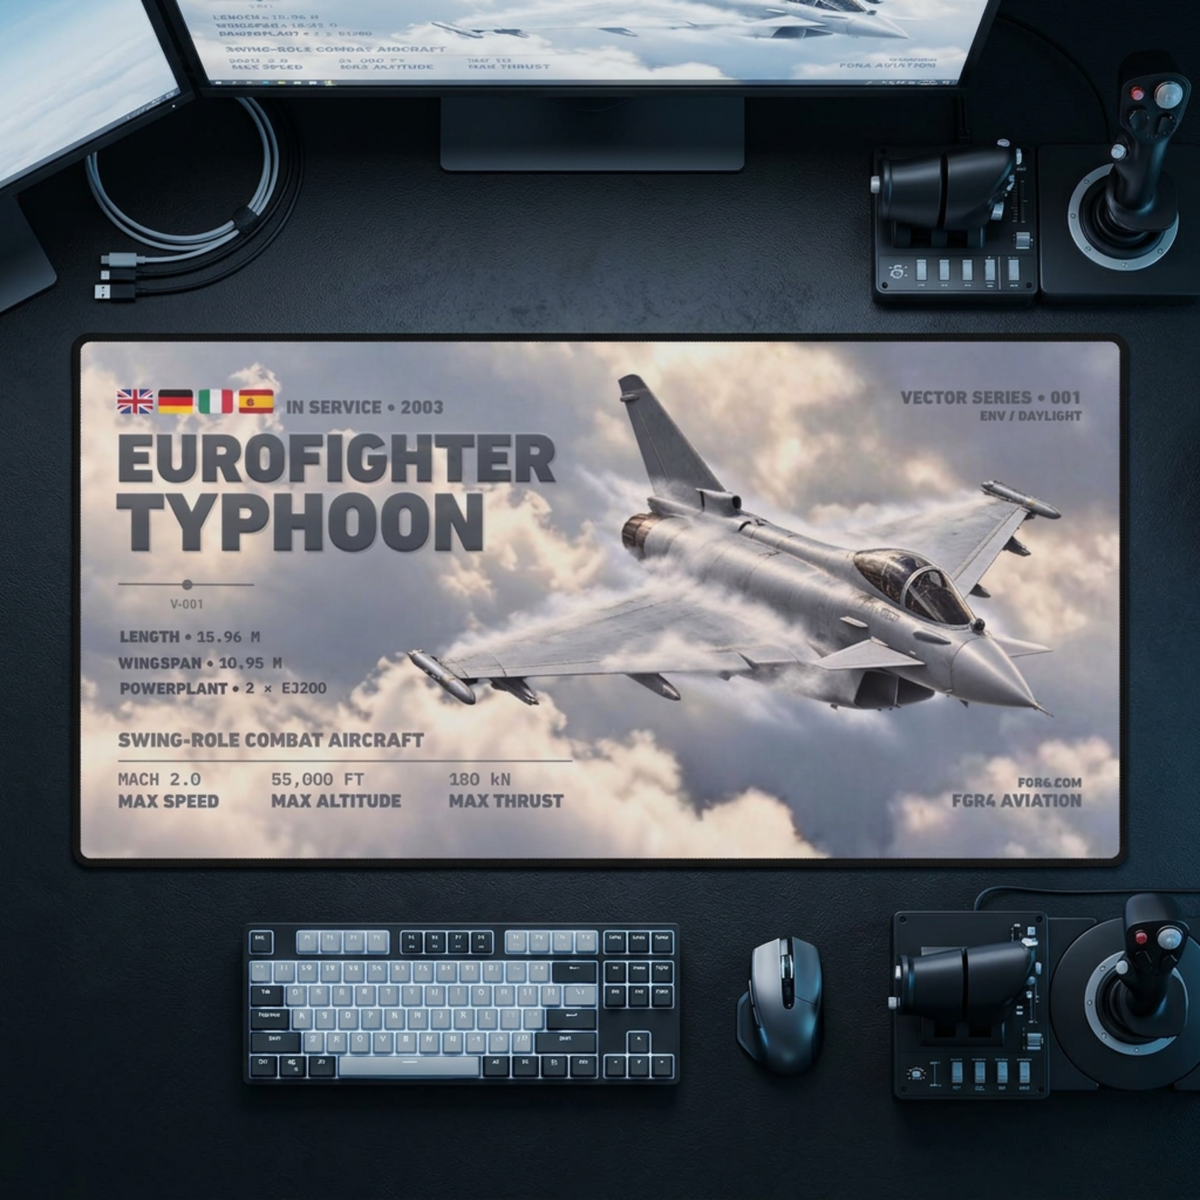
An aviation desk mat should sit where your keyboard and mouse naturally work, not where the empty desk looks most symmetrical. Start by marking the mat’s full footprint, return your equipment to its normal positions, then move the mat beneath that working area.
The current FGR4 Vector desk mats used in this guide are listed at 31.5 × 15.5 inches / 800 × 400 mm. That gives us a known rectangle to plan around. Your keyboard, mouse, monitor feet and controls still need to be measured because their footprints decide the final position.
Mark the 800 × 400 mm footprint first
Use low-tack tape, sheets of paper or a measuring tape to outline an 800 × 400 mm rectangle on the clear part of the desk. Do this before moving your equipment. The outline shows whether the mat will meet a monitor base, speaker, cable opening or flight-control mount that was easy to overlook.
Measure the usable surface rather than the complete desktop. If a monitor stand occupies the rear 200 mm, that area is not automatically available to the mat. The earlier large aviation desk mat size guide covers the first fit check; this guide starts once you know the rectangle can fit.
Place the keyboard before centring the mat
Put the keyboard where you normally use it, including any wrist rest that always stays with it. Measure its width and depth. Then slide the marked mat footprint beneath that position. A compact keyboard can leave a wider mouse area; a full-size keyboard will leave less. The useful layout is the one that reflects the equipment you actually own.
Avoid treating the centre line as a target. If the keyboard is centred on the whole mat, the remaining mouse area is split between both sides. That may be useful for an ambidextrous setup, but it can waste width when the mouse always sits on one side. Offset the keyboard only as far as your normal working position allows.
Reserve a mouse zone, not just a mouse-sized gap
A stationary mouse occupies very little room. The working zone is the area through which it travels. Put the mouse in its normal position and move it through the range you use, then mark the outer boundary. Keep that zone clear of a monitor foot, cable hub, notebook and flight control.
The diagram below uses an illustrative 360 × 140 mm compact keyboard and a 330 × 240 mm mouse zone on an 800 × 400 mm mat. These are planning examples, not recommended equipment positions. Replace both measurements with your own.
In this example, the keyboard begins 30 mm from the left edge and 220 mm from the rear edge. The mouse zone begins 424 mm from the left edge. That leaves a 34 mm gap between the two zones and 46 mm at the right edge. The numbers show how to account for the rectangle; they do not prescribe a typing posture.
Decide what the monitor stand does
The monitor stand creates the most common placement decision. Choose one of three arrangements after measuring its feet:
Keep the monitor feet on the desktop behind the mat. This leaves the complete mat surface for the keyboard and mouse, provided the desk has enough depth.
Place the stand feet on the rear portion only when the full base fits securely and the manufacturer’s instructions allow that surface.
With no desktop base, plan from the keyboard and mouse positions, while keeping clamps and mounting hardware clear of the mat.
Do not bridge one monitor foot on the mat and one on the bare desk. The two surfaces may differ in height. Keep the complete base on one stable surface and follow the monitor manufacturer’s installation instructions.
Set the distance from the desk edge last
Once the keyboard, mouse zone and monitor footprint work together, check the front edge. A small strip of exposed desk can keep the stitched mat edge away from the desk lip; bringing the mat to the edge can maximise depth. Test both with your actual keyboard position and choose the arrangement that leaves the equipment stable and the surface unobstructed.
Keep clamps, sharp brackets and permanent mounting pressure off the mat unless the relevant equipment instructions explicitly allow that arrangement. If a yoke, throttle or joystick shares the desk, the shared work and flight-sim desk guide explains how to give removable controls a repeatable position.
Check what the equipment covers
Placement also changes the visible artwork. The owned setup image above shows a Eurofighter Typhoon Vector Desk Mat with equipment arranged around the printed surface. Its current product page lists the same 800 × 400 mm format used in the diagram.
Before ordering, compare your marked equipment zones with the complete product image. Decide whether the aircraft, title or technical details you value remain visible. The Typhoon keyboard-coverage guide gives a separate artwork-focused exercise. The current Avro Vulcan Vector Desk Mat provides another live 800 × 400 mm composition for repeating the same placement check with a different aircraft.
Run a two-minute placement test
- Mark an 800 × 400 mm rectangle on the usable desk surface.
- Return the keyboard, mouse and wrist rest to their normal positions.
- Trace the mouse’s working travel area rather than its resting footprint.
- Measure every monitor foot or flight-control mount near the rectangle.
- Choose whether the monitor base sits fully behind or fully on the mat.
- Compare the occupied zones with the complete product artwork.
If the rectangle fits and the layout still works, the mat can sit beneath the equipment without forcing a new desk routine. If it does not, revise the equipment positions or choose another surface size before ordering.
Start with the working zone
The best placement begins with the keyboard and mouse you use every day. Mark the full mat, protect the mouse travel zone, account for the entire monitor base, and only then adjust the mat’s alignment. The result may be slightly offset on the desk, but it will be deliberate.
Browse the live FGR4 aviation desk mat collection once you have measured the 800 × 400 mm working zone and know which part of the artwork will remain visible.
Evidence note
The two representative Vector product pages and the Desk Mats collection were checked on 16 October 2026. Both products were active and listed the 31.5 × 15.5 inch / 800 × 400 mm format. All equipment positions and zones in this article are explicitly illustrative; measure your own equipment and follow its manufacturer instructions.